Professional Vinyl Repair Kit – Valley AG Canvas
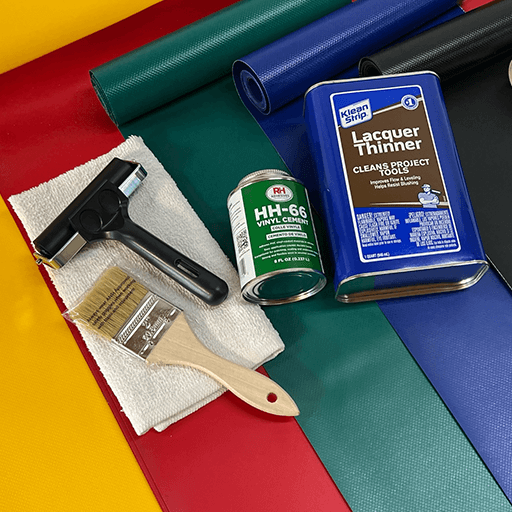
The Professional Vinyl Repair Kit is designed to provide a comprehensive solution for repairing tears and holes in vinyl, offering durability and long-lasting results. This all-inclusive kit includes the following components: Durable Vinyl Material: The kit includes a high-quality vinyl material that is resilient and
The Professional Vinyl Repair Kit is designed to provide a comprehensive solution for repairing tears and holes in vinyl, offering durability and long-lasting results. This all-inclusive kit includes the following components:
Durable Vinyl Material: The kit includes a high-quality vinyl material that is resilient and suitable for various applications.
Lacquer Thinner and Rag: To ensure a proper repair, the kit includes lacquer thinner and a rag for cleaning and preparing both the damaged area and the vinyl material. This step helps remove any contaminants and ensures a clean surface for the repair.
Vinyl Cement: The kit includes vinyl cement, which is a strong adhesive specifically formulated for repairing vinyl. This cement enables seamless and reliable repair, ensuring that the repaired area remains intact over time.
Disposable Brush: A disposable brush is included in the kit to facilitate the application of the vinyl cement. This brush allows for precise and controlled application, ensuring an effective bond between the vinyl material and the damaged area.
Roller: The kit also includes a roller, which is a helpful tool for smoothing out the repaired area. It aids in eliminating air bubbles and creating a strong and secure seal between the repaired vinyl and the surrounding material.
By providing all the necessary components, the Professional Vinyl Repair Kit offers convenience and effectiveness, allowing you to restore and maintain the integrity of your vinyl investments for years to come.
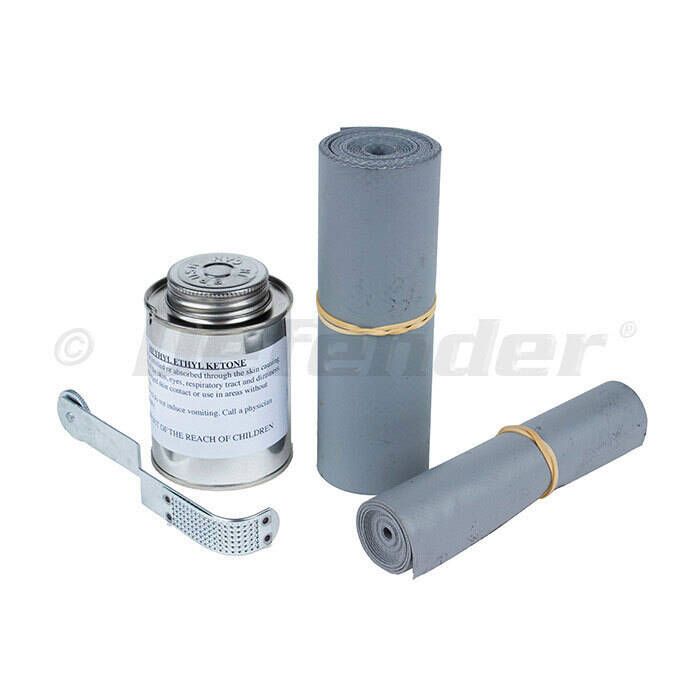
Included in the kit:
Vinyl Material: 36x61.25 (15.3125 square feet)
Lacquer thinner: 1 quart
HH-66 Vinyl cement Brushtop Can 8oz
Brush: 1
Rag: 1
4 Hand Roller (Not shown in picture)
Warning: Industrial-grade hazardous chemicals. Avoid breathing fumes and skin contact. Seal lids promptly. Keep out of reach of children. Work in a well-ventilated area.
Instructions:
Cleaning: Ensure that both the vinyl material (patch and the item being repaired) are clean and dry before starting. Use the provided rag soaked in lacquer thinner to thoroughly clean the damaged area and the patch material. This step removes the UV coating and prepares the surface for the vinyl cement.
Shaping the Patch: Shape the vinyl patch material to cover the hole, ensuring it has a 4 overlap. Trim the corners of the patch, giving it a bandage-like shape. This provides sufficient surface area to distribute strain on the patch.
Dry Fit: Place the shaped patch on the cleaned and treated surface. Draw an outline around the patch onto the repair area. This helps you visualize the final result and prevents excess glue marks.
Orienting the Patch: The vinyl material has two sides. The UV-treated side has a shine, while the non-UV treated side appears duller. Consider the orientation based on the repair location's sun exposure. It is advisable to have the UV side facing the area with the most sun exposure.
Applying Vinyl Cement: Apply a thin and accurate layer of HH-66 Vinyl Cement on both the treated side of the patch and the repair area. Wait until the cement becomes tacky on both surfaces. Carefully align the patch and slowly press it down, minimizing air bubbles. Once the cement has joined the surfaces, it cannot be removed, so ensure proper alignment.
Patching the Hole: Apply vinyl cement on both sides of the fabric around the hole, ensuring a 4 overlap around the hole. This strengthens the patch and provides a secure repair.
Warning: The provided kit contains industrial-grade chemicals. Take precautions to avoid breathing fumes and direct skin contact. Keep the lids closed when not in use and store the kit out of reach of children. Perform the repair in a well-ventilated area.
This 70% Mesh Professional Patch Kit provides the ideal solution for covering holes and rips in mesh material. It provides a secure, long-lasting bond

70% Mesh Professional Patch Kit
[Size]:9×11x2pcs,Large size enough to help you repair all kinds of fabric damage, such as tears, pet scratches, holes, fading, burns and other

KING MOUNTAIN Canvas Repair Patch 9 x11 Inch 2 Pcs Self-Adhesive Waterproof Fabric Patch for Sofas, Tents, Furniture,Tote Bags, Car Seats (Grey)
Ingredient: Resin Glue, Thickening Agent. Drying(a small amount of repairing and drying for about half an hour), you can also use a hair dryer to dry

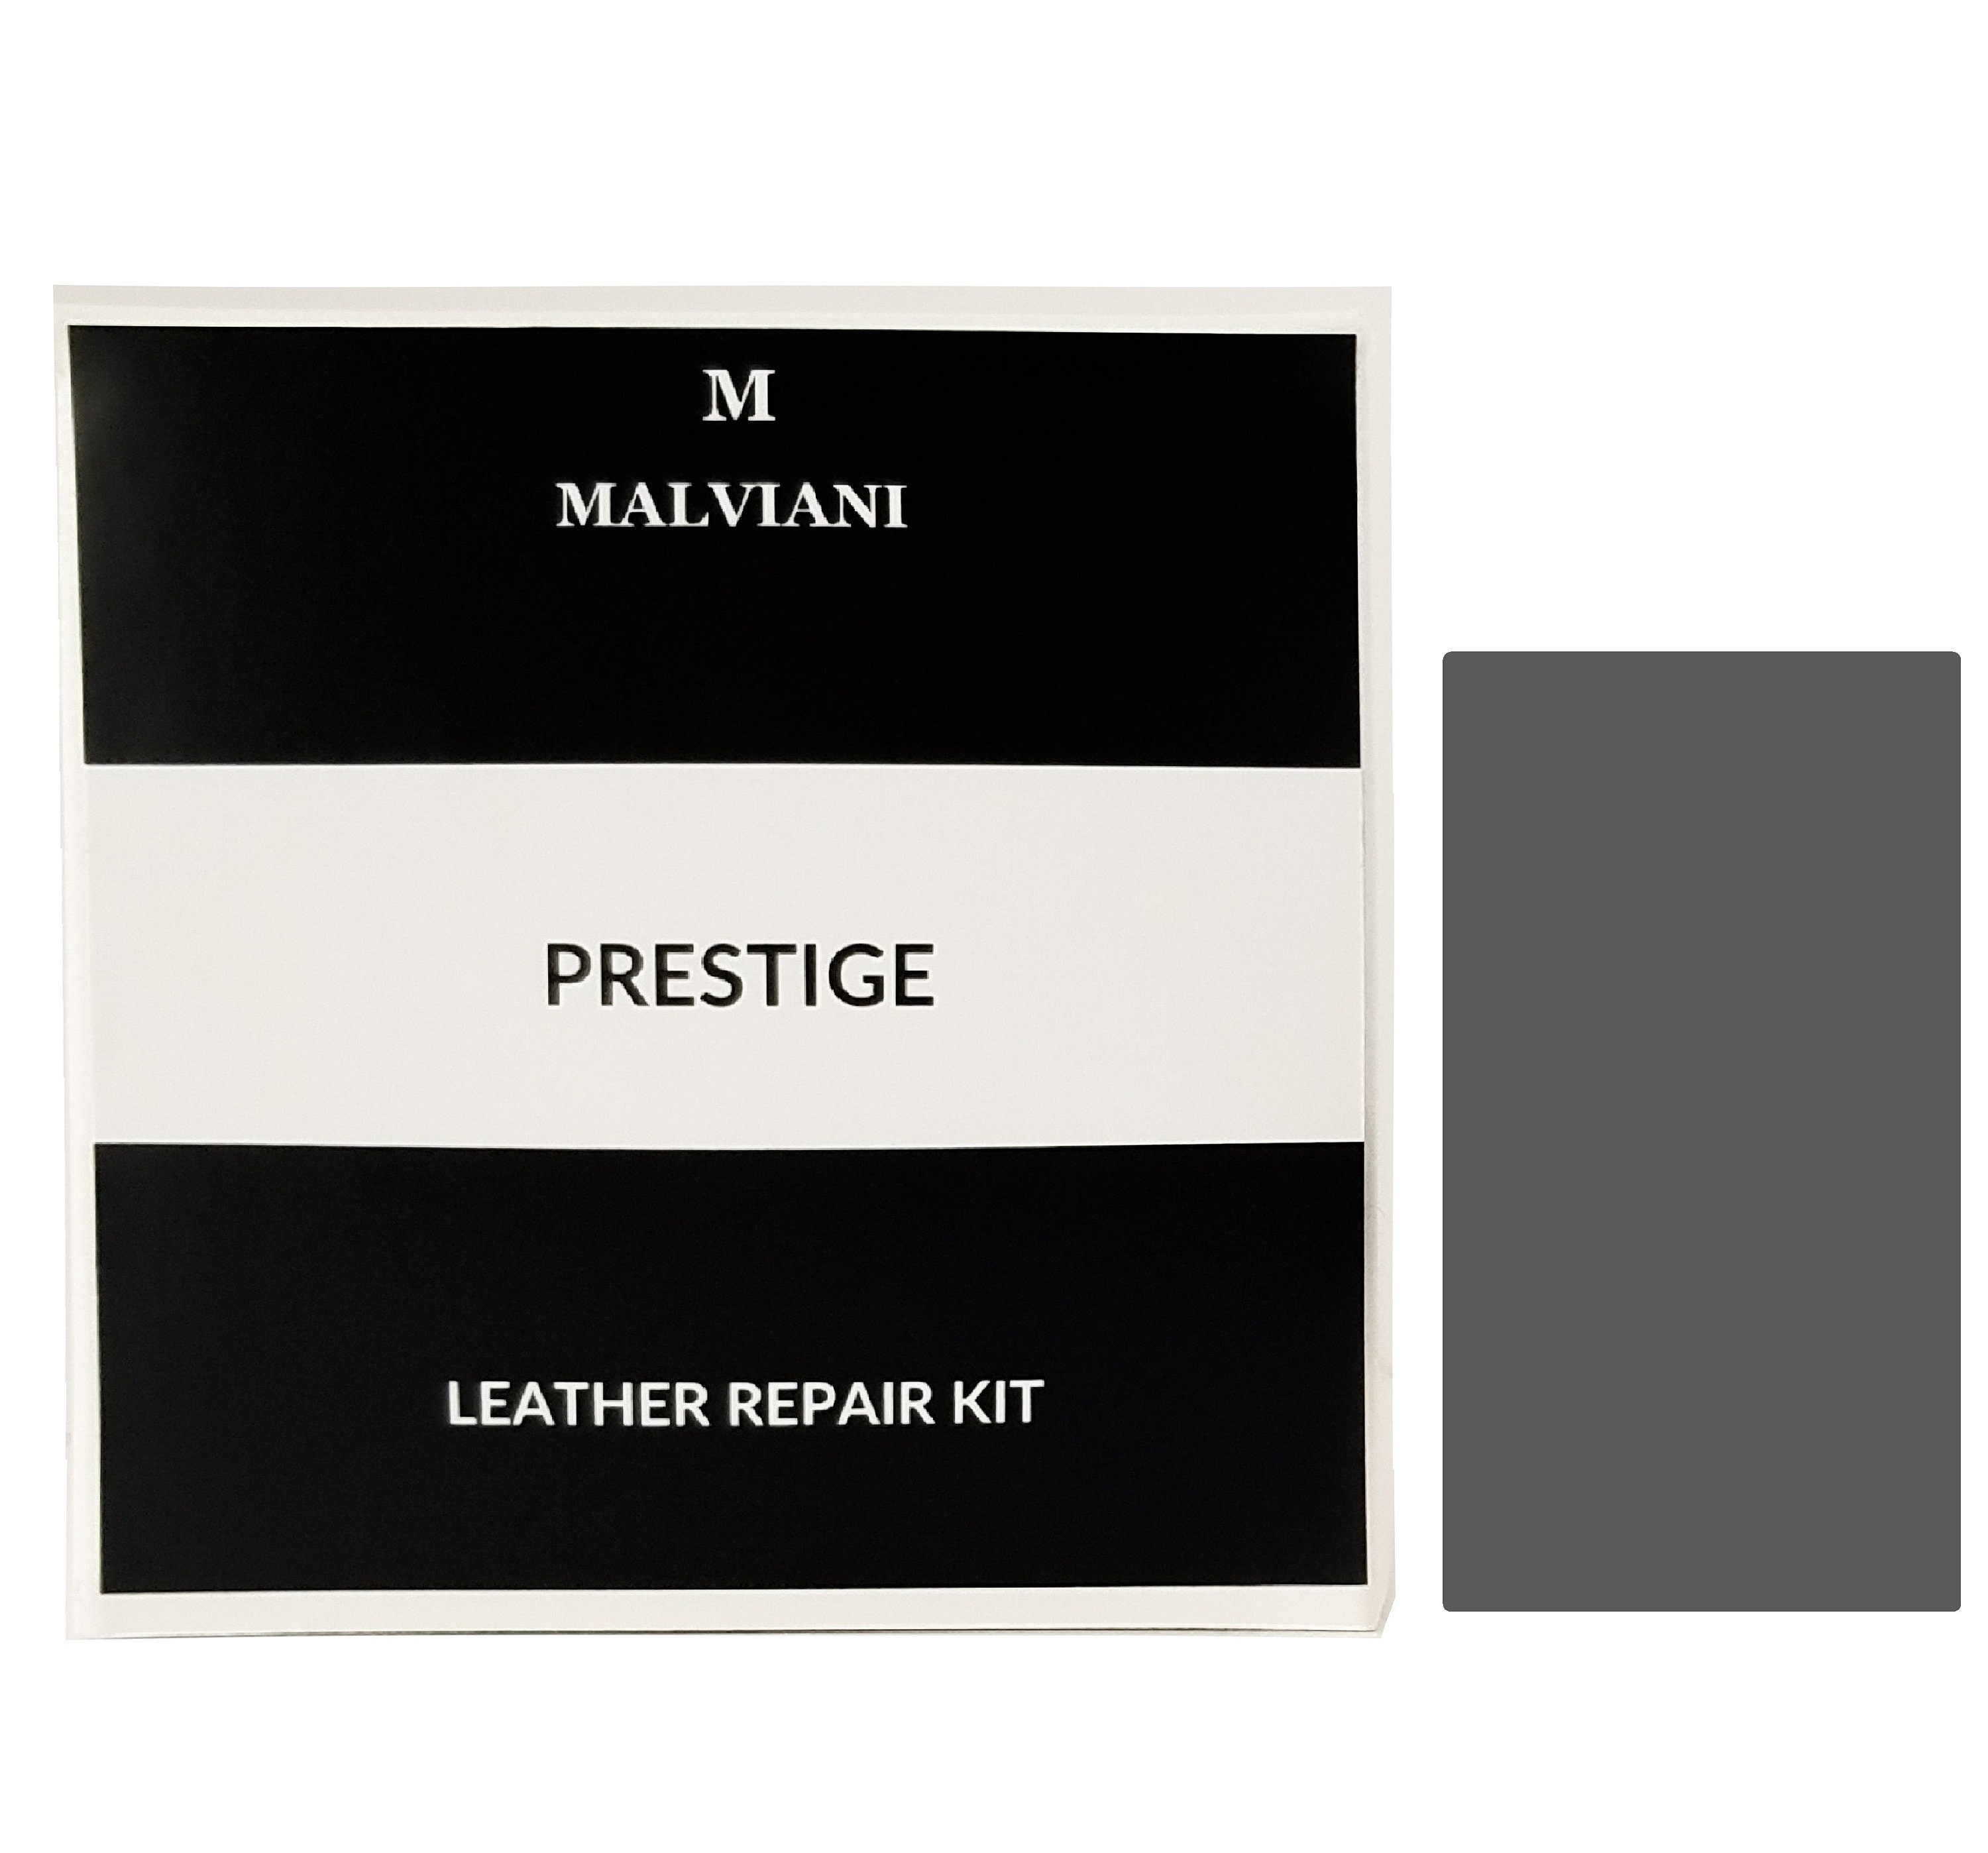
50/60ml No Heat Leather /Vinyl Repair Kit Fix Car Sofa Holes Burn Rip Gouges Gel
Vinyl Repair Kit
START YOUR OWN BUSINESS- STARTER KIT This Leather & Vinyl Repair Toolbox Kit includes everything needed to make professional repairs. You can repair
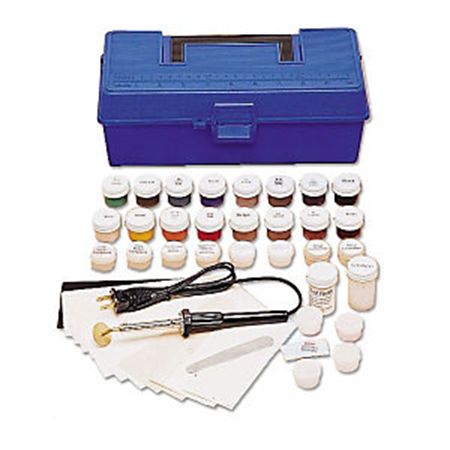
Start your own business Starter Kit-Leather and Vinyl Repair

50/60ml No Heat Leather /Vinyl Repair Kit Fix Car Sofa Holes Burn Rip Gouges Gel

Mini-Pro Vinyl Repair Kit - Leather Magic!™ DIY Leather Repair Kits

Vinyl Repair Kits
Vinyl Repair Kit
Quick fix for your vinyl utility tarps or truck tarps. HH66 is a vinyl cement that is strong, waterproof and stays flexible in extreme weather

Vinyl Repair Kits - Montana Canvas

Kits::Professional

Vinyl Repair Kit
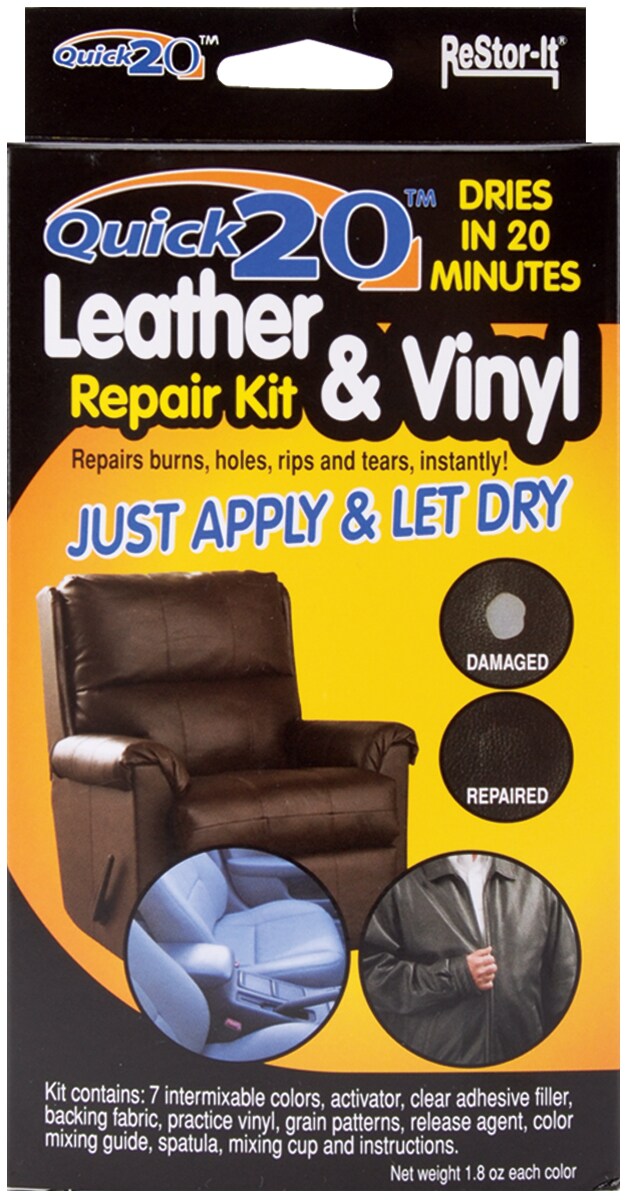
Kit repairs cuts, tears and burns in automotive leather and vinyl Color matching guide helps customize the color Textured grain papers help match

3M Leather and Vinyl Repair Kit, 08579
♥ One of the best ORIGINAL DIY leather repair kit & vinyl repair kit in the market that will help you touch up, fix, repair your leather & vinyl

QUQUTWO Leather and Vinyl Repair Kit - Furniture, Couch, Car Seats, Sofa, Jacket, Purse

Leather & Vinyl Repair Supplies & Tools