How to Determine the Optimal Speed and Power Settings for Different Ma – WIZMAKER
When using a laser engraving machine for engraving and cutting, we often struggle to find the right parameters. Inappropriate settings can result in unclear engraving patterns, excessive charring, difficulty cutting through materials, and ultimately lead to significant material and time wastage in completing our projec
When using a laser engraving machine for engraving and cutting, we often struggle to find the right parameters. Inappropriate settings can result in unclear engraving patterns, excessive charring, difficulty cutting through materials, and ultimately lead to significant material and time wastage in completing our projects.Based on this, it's essential to conduct a preliminary test when performing cutting or engraving to identify the most suitable parameters – the perfect combination of speed and power. Below, I'll explain the steps to find the optimal settings.Firstly, Lightburn provides a straightforward feature to assist us. So, open Lightburn and navigate to the Lightburn interface. Click on Material Test under Laser Tools (Image 1).
(Image 1)
Next, you will enter the Material Test Generator interface (as shown in Image 2). Here, you can configure the parameters you want to test. Since our goal is to determine the appropriate speed and power for engraving or cutting, select Speed for the parameter in the Vertical/Rows section and Power for the parameter in the Horizontal/Columns section.
(Image 2)
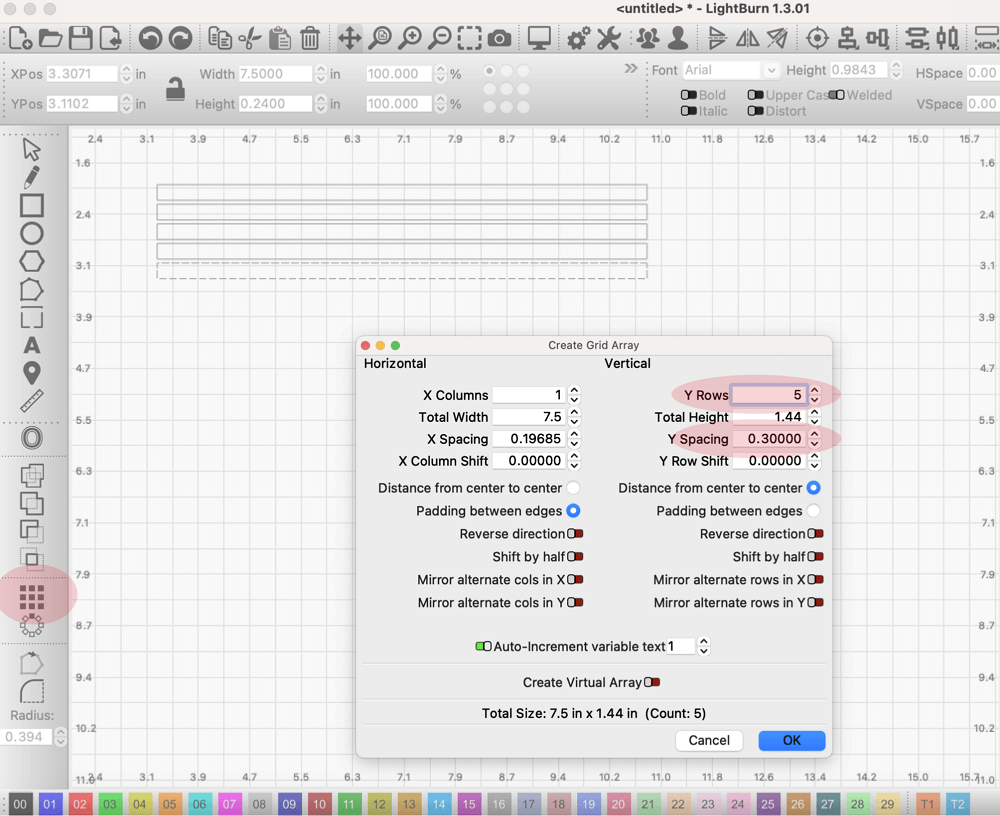
If you want to test different cutting effects with speed ranging from 200mm/min to 2000mm/min and power varying from 10% to 100%, you should enter the following values (Image 3):In the Vertical/Rows section:Min: 200mm/minMax: 2000mm/minIn the Horizontal/Columns section:Min: 10%Max: 100%
(Image 3)
Since we aim to test cutting effects, you need to click on Edit Material Settings (Image 4) and select Line under Mode (Image 5). However, if you wish to test engraving effects, you should choose Fill under Mode.
(Image 4)
(Image 5)
Afterward, click OK. Then, click Preview to examine the previewed results (Image 6) and verify if it's the test pattern you intend to use.
(Image 6)
Now, let's take the example of cutting a 5mm thick wooden board using a Wizmaker 36W laser engraving machine. We want to find the speed and power parameters suitable for cutting 5mm wood. In this case, we set the speed to range from 100mm/min to 500mm/min and the power from 10% to 100%, as shown in the image below(Image 7).
(Image 7)
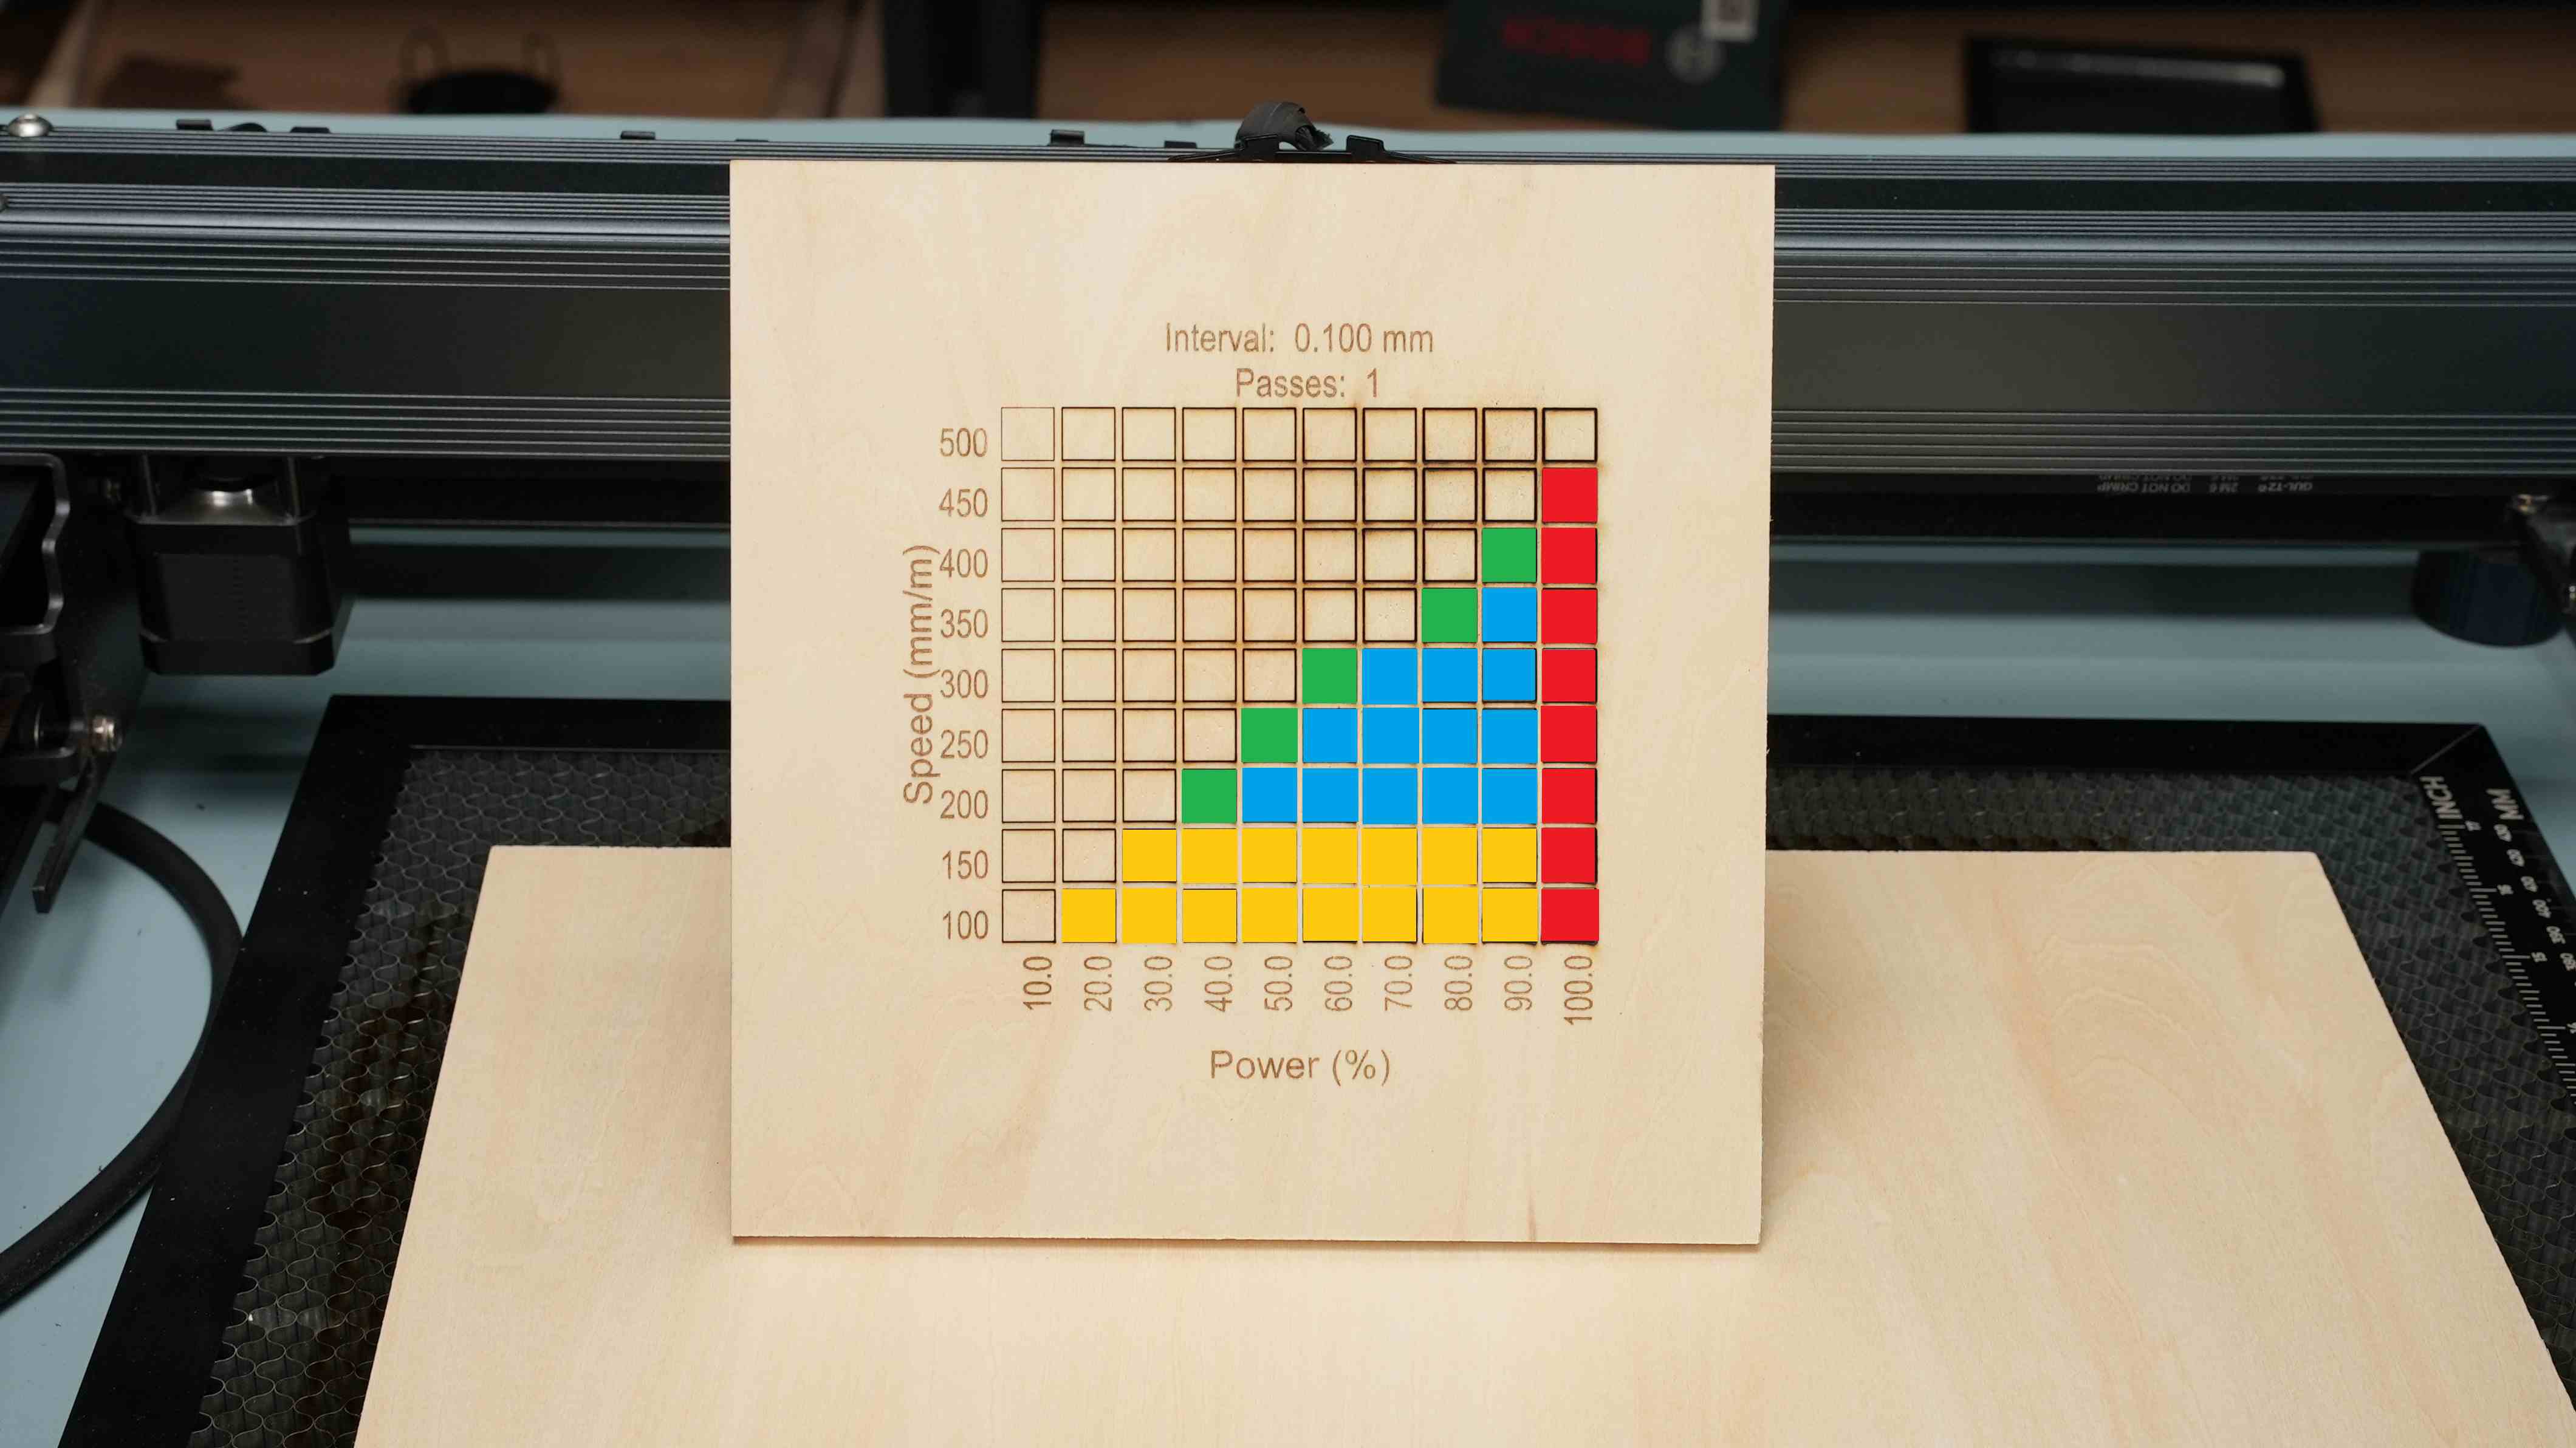
We click Start Test, and the test results are as follows(Image 8):The red area represents No Good, indicating that the power is too high, causing the edges to char easily.The yellow area represents Speed Too Slow, indicating that the speed is too slow, which reduces efficiency in completing the work.The green area represents Too Borderline, where the cutting power and speed are close to the boundary values, making it prone to inconsistent cutting.The blue area represents Perfect, and this is the part where the speed and power settings are suitable and can be used as reference.
(Image 8)
Additionally, we have conducted a set of tests to determine the suitable power and speed for engraving. We used a Wizmaker 12W laser engraving machine for engraving on 3mm plywood. The speed was set to range from 500mm/min to 5000mm/min, and the power ranged from 10% to 100%, as specified below(Image 9):
(Image 9)
However, it's important to note that since we are conducting engraving tests, we need to click on Edit Material Settings and select Fill under Mode. After that, we initiate the test. After a 3-hour engraving test, we obtain our test results (Image 10).
(Image 10)
Because everyone has different requirements for engraving effects, the suitable power and speed will also vary. Based on the test results, you can choose the engraving effect you desire, thereby confirming the power and speed settings that match your preferences.

Simple and Stable 13.8V DC Regulator With LM713, PDF, Power Supply

YoraHome 10 Things You Should Know About LightBurn Software - YoraHome Blog

WIZMAKER L1 Laser Engraver, 24W Output Power Laser Cutter, High Accuracy Laser Engraving Machine, 120W Lazer Cutting Machine, Laser Engraver for Wood and Metal, Craft Paper, Acrylic, Leather, Red : Arts
Laser Working Distance Calibration Guide

YoraHome 10 Things You Should Know About LightBurn Software - YoraHome Blog

Wizmaker P1 Cura Settings! FDM 3D Printer.

Adjustment Tutorial for Wizmaker Laser Engraving Machine's Eccentric Nut and Belt
Minimum power settings seem too hot - LightBurn Hardware Compatibility - LightBurn Software Forum
Making the Radeon RX 5700 and RX 5700 XT more energy-efficient and significantly quieter with the MorePowerTool, Tutorial, Page 2

FSP3-480-20KA Thomas Research Products
10 Tips and Tricks for Laser Engraving and Cutting : 10 Steps (with Pictures) - Instructables
Laser Engraving Speed Chart: What Are the Optimal Laser Settings? – OMTech Laser
Best Laser Engraver & Cutter Software of 2024 (Free & Paid) - xTool